 Dog Gear, Sized Right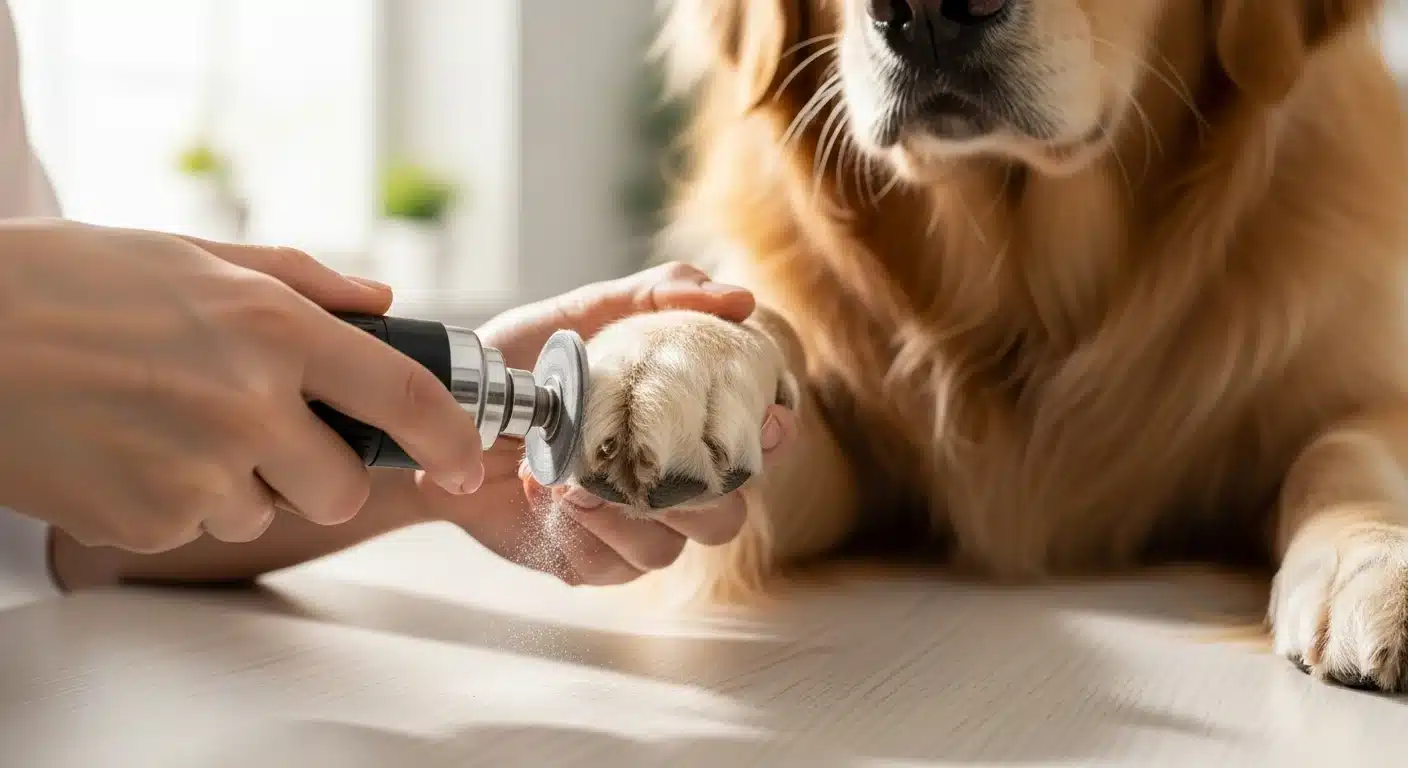
How Often Should You Cut a Dog’s Nails?
The honest answer: most dogs need a trim every 3 to 4 weeks. Here’s how to know when it’s time, what happens when you wait too long, and how to make the whole thing easier.
How often should you cut a dog’s nails? For most dogs the answer is every three to four weeks, but the real test isn’t a calendar. It’s the floor. If you hear a click-click-click as your dog walks across hardwood or tile, or you can see the nails touching the ground when your dog stands squarely, they’ve already grown too long. Active dogs who run on pavement or concrete naturally wear their nails down and may go six weeks between trims. Indoor dogs on soft flooring, grass-walkers, seniors, and any dog with dewclaws (which never touch the ground at all) need attention more often, sometimes every two weeks. This guide covers why overgrown nails cause real problems, the factors that change your dog’s individual schedule, the grinder-vs-clipper choice, how to find and avoid the quick, and what to do with a dog who’d rather be anywhere else when the nail kit comes out.
Our pick for at-home nail care
We focus on one tool here because most owners genuinely only need one: a rotary grinder that lets you work gradually and safely. This listing is verified in stock, tap through for the live price.
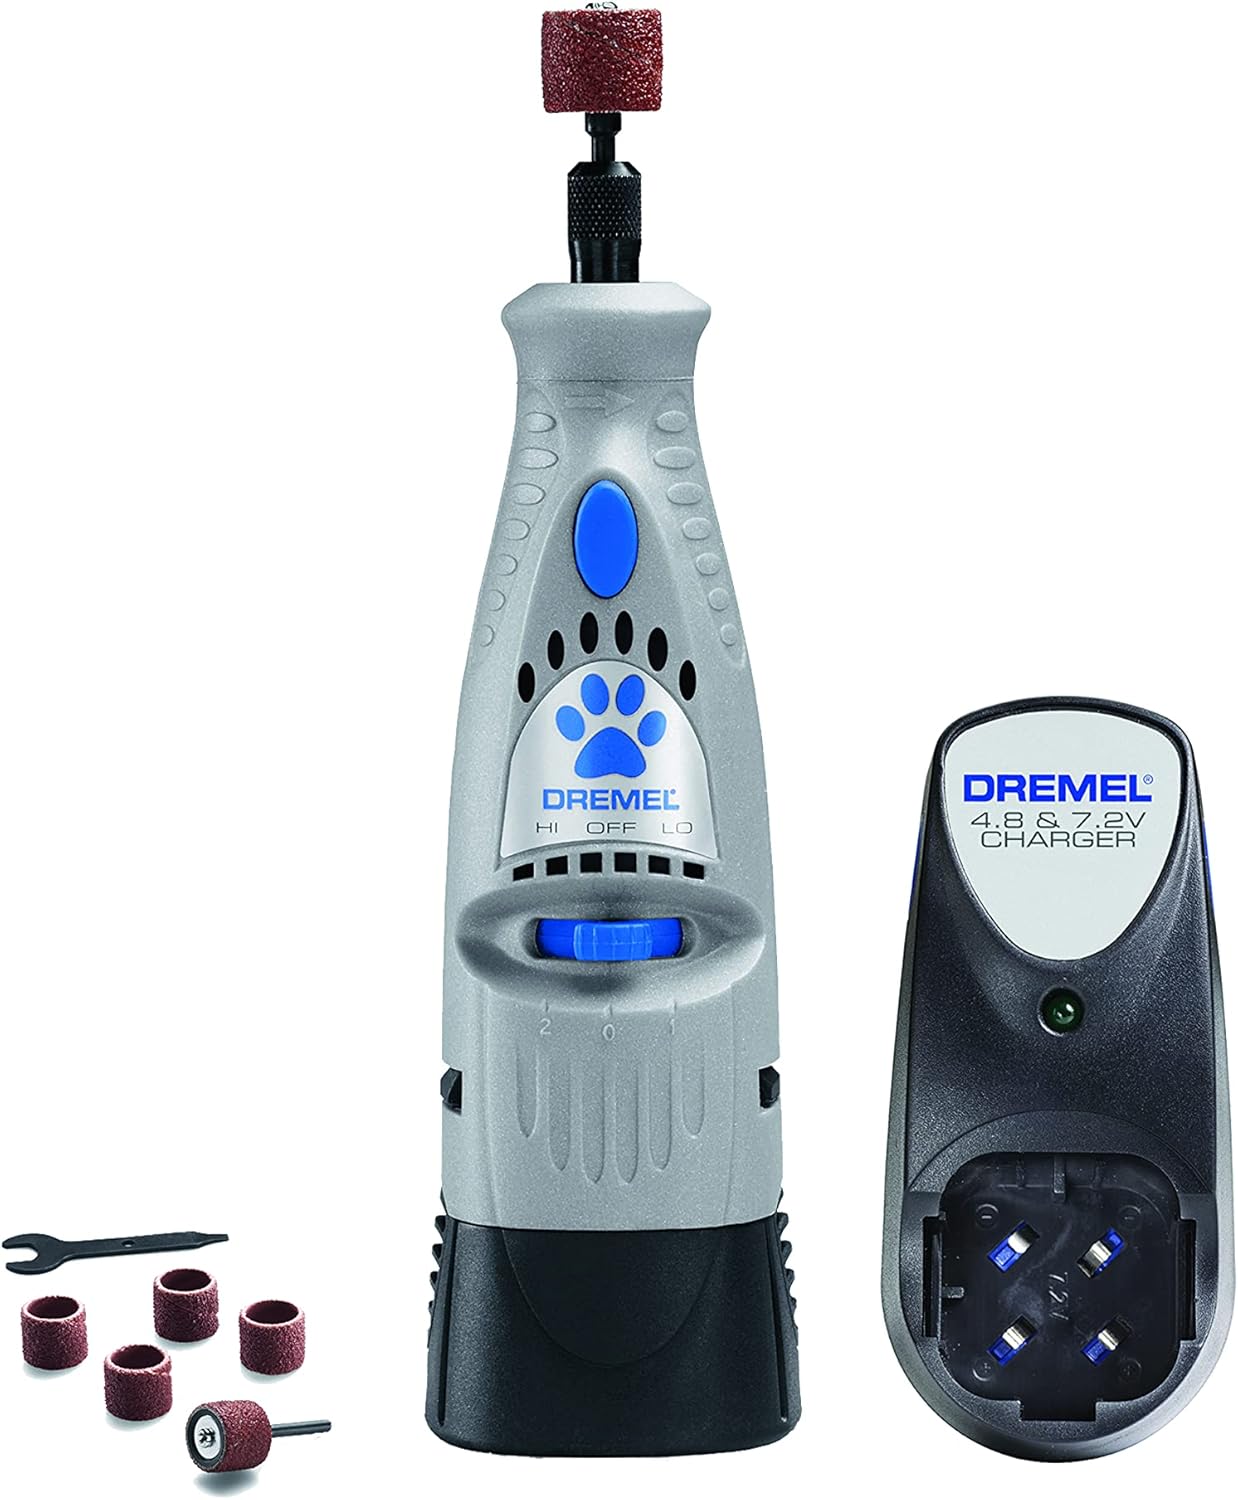
Dremel 7300-PT Pet Nail Grinder
The Dremel 7300-PT is the grinder we’d hand to most owners who want to ditch clippers for good. The cordless design at two speeds (6,500 and 15,000 rpm) handles fine puppy nails at the low setting and a Labrador’s thick hooves at the high one, and because a grinder smooths gradually rather than cutting in one snap, it gives you far more control over exactly how close you get to the quick. It ships with five sanding bands (60- and 120-grit) in coarse and fine for any growth stage. For anxious dogs, the lower speed is noticeably quieter than a lot of pet-specific grinders, and the smaller drum head fits even narrow terrier nails without catching the surrounding fur.
What we like
- Two speeds (6,500 / 15,000 rpm) cover fine puppy nails through thick large-breed hooves
- Gradual material removal gives far more control near the quick than clippers
- Cordless, no cable awkwardness when positioning a wriggly dog
- Ships with 5 sanding bands (coarse + fine); replacement bands widely available
The catches
- Takes a little longer per nail than a clipper snip, budget a couple of extra minutes
- Battery life covers a session easily but does need overnight charging between heavy-use weeks
- First-time dogs need a desensitisation period with the noise before you start on nails
Why overgrown nails are a real problem, not just cosmetic
It’s easy to treat nail length as purely aesthetic, but overgrown nails cause a cascade of physical issues that owners often don’t connect to the nails at all.
- Pain and altered gait. When nails touch the ground on every step, the dog’s toes are pushed back and sideways. That constant pressure is genuinely uncomfortable, think of always walking with your toes bent under. Dogs compensate by shifting their weight back, which changes the way the whole body moves.
- Splayed feet. Over time, that sideways toe pressure spreads the foot, loosening the natural arch of the paw and causing the toes to splay. Once this happens it’s slow to reverse.
- Joint and posture strain. Because a dog carrying too-long nails shifts weight onto its rear and shortens its stride, the hips, stifles, and back all absorb more stress than they should. This is particularly consequential in large breeds already prone to joint issues.
- Torn nails. Long nails snag on carpet, upholstery, grates, and rough ground far more easily than short ones. A torn nail, especially one torn close to the base, is painful, bleeds heavily, and can require vet attention. Keeping nails short dramatically lowers this risk.
- The quick grows too. The blood vessel and nerve inside each nail (the “quick”) grow forward as the nail grows. The longer you wait, the further forward the quick extends, which means trimming back to a comfortable length requires either multiple short sessions or a higher risk of cutting into the quick. Regular, short trims actually train the quick to recede over time, making future trims easier.
The AKC’s veterinary guidance agrees: trimming before nails reach the floor isn’t fussy grooming, it’s basic health maintenance on par with keeping teeth clean or ears checked.
How to know it’s time: the click test and the ground test
You don’t need to be a groomer to know when your dog’s nails are too long. Two quick checks tell you:
- The click test. Walk your dog across a hard floor, tile, hardwood, laminate. If you hear clicking, the nails are touching the surface and are overdue. Silent footfalls are the goal.
- The standing ground test. Have your dog stand squarely on a flat surface and look at the paws side-on. The nails should clear the ground, not curl under, not visibly touch. If any nail rests on the floor, trim time is now.
For dark or black nails where you can’t see the quick, these tests are especially useful: if the nail passes both, you still have margin. If it fails either, you know it’s past due regardless of what the inside looks like.
The ideal finished length is roughly 2 to 3 mm above the floor when the dog stands flat-footed, close enough to clear the ground comfortably, with a small cushion before you’d hit the quick.
Factors that change your dog’s individual nail-trimming schedule
The 3 to 4 week baseline shifts quite a bit depending on the dog. Here are the main variables:
| Factor | Effect on frequency | Practical takeaway |
|---|---|---|
| Activity level & surface | Pavement and concrete naturally file nails down | Road-walking dogs may go 5 to 6 weeks; grass-only or indoor dogs trim every 2 to 3 |
| Dewclaws | Never contact the ground, so never wear down | Dewclaws need independent trimming, often more frequently than the main nails |
| Breed & nail type | Large breeds often have thicker, faster-growing nails; some breeds have splayed feet that angle nails oddly | Giant breeds especially benefit from a grinder over clippers |
| Age | Puppies’ nails grow fast and are very sharp; seniors may exercise less and lose the filing effect of activity | Check puppies every 2 weeks; seniors may revert to a shorter schedule even if they were long-interval adults |
| Individual growth rate | Varies by dog even within a breed | Track how fast your specific dog crosses from “just trimmed” to “clicking”, that’s your real interval |
The single most reliable approach is to check paws weekly (most dogs will accept a quick glance if you make it a habit), then trim when the nails are approaching, not already past, the ground. That way you’re always working with manageable nail length and a receding quick, not trying to catch up after months of growth.
Grinder vs clippers: which is better for home trimming?
Both tools work. The choice comes down to your dog, your confidence, and what you’re trying to achieve.
Clippers (guillotine or scissor-style) are fast, one squeeze, nail done. For dogs with fine, light-coloured nails and a calm disposition, they’re the most efficient option. The limitation is precision: one slip and you’ve cut the quick, which bleeds, hurts, and often creates a dog who dreads future nail sessions. On thick nails, common in large breeds, a clipper can crush before it cuts, which is uncomfortable even when you don’t hit the quick.
Rotary grinders like the Dremel 7300-PT remove material gradually, a thin layer at a time, giving you much more control over exactly how close you get to the quick. The finish is also naturally smooth and rounded, no sharp edges that catch on carpet or scratch floors. They take a little longer per nail, and dogs need an acclimatisation period with the noise and vibration, but for thick nails, black nails, or anxious dogs, a grinder is genuinely easier to use safely at home than a clipper.
How to find the quick and avoid cutting it
The quick is the living part of the nail, the blood vessel and nerve that supply it. Cut into it and you’ll get bleeding and, more importantly, a dog who associates nail trims with pain. Here’s how to find it and stay clear:
On light or white nails you can often see the quick directly: it’s the pink shadow running through the centre of the nail. Stop 2 mm before you reach it. Using a bright torch or phone light held under the nail makes the shadow more visible.
On dark or black nails you can’t see through, so work in small increments and look at the cut cross-section after each pass. As you approach the quick, the centre of the nail will change from a chalky, dry appearance to a small dark dot, sometimes called the “pulp.” That dot means you’re close; stop there.
With a grinder (vs clippers), you get more warning: the surface of the nail will feel slightly softer as you grind closer to the quick, and, if your dog is sensitive, they’ll start to pull the paw back just before you reach it. Treat that as a signal to stop.
If you do nick the quick: stay calm. Apply styptic powder (cornstarch works as a backup), press for 30 seconds, and once bleeding stops, end the session with something positive. Don’t try to finish all four paws, one nicked quick ruins the session for the dog. Keep styptic powder in your grooming kit at all times.
Getting a nervous dog comfortable with nail trims
Nail aversion is extremely common, and almost always fixable, given time and the right approach. The mistake most owners make is trying to power through a full trim on a resistant dog, which cements the association between nail trims and distress. Instead, build the association incrementally:
- Week 1: paw handling. Touch and gently squeeze each paw, each toe, each nail, no tools, no trims. Do this while the dog is relaxed or during a cuddle. Reward every calm paw with high-value treats. The goal is a dog who doesn’t flinch at having their feet handled.
- Week 2: introduce the tool (off). Let the dog sniff and investigate the grinder or clipper while it’s off. Reward for calm investigation. Place it on the paw without using it. Keep sessions under 2 minutes.
- Week 3: sound desensitisation (grinder only). Run the grinder near the dog but not touching. Pair the sound with high-value treats. Do this for a few sessions until the sound alone doesn’t cause a reaction.
- Week 4: first contact. Touch the running grinder to one nail for one second. Treat, praise, end the session. Gradually extend contact over multiple sessions.
- One nail at a time is a real option. There’s no rule that says you have to do all 20 nails in one go. If your dog tolerates two nails happily, do two, treat heavily, stop. Come back tomorrow. Spread over a week, that’s a full paw set with zero stress.
For dogs with severe nail anxiety, biting, screaming, full-body struggle, a professional groomer or vet visit for the first few trims can break the cycle. Once the dog has had a calm experience, reintroducing home trims becomes much easier.
More at-home grooming techniques in our how to groom a dog at home guide.
Special cases: dewclaws, puppies, and seniors
Three groups that need more attention than the standard schedule:
Dewclaws. The “thumb” nail on the inside of the leg (and sometimes on the rear legs in some breeds) never contacts the ground, so it gets zero natural wear. Left untrimmed, dewclaws can grow in a curve and eventually circle back into the pad, genuinely painful and occasionally requiring vet intervention to correct. Check dewclaws every week and trim them independently of the main nails whenever they’re growing away from the leg or reaching the length where curling could start.
Puppies. Young nails grow fast and are sharp as needles. Start handling paws from day one, before you even need to trim, so the adult dog is already comfortable. Puppy nails are thin and easy to nick, so use only fine-grit sanding bands on a grinder at the lowest speed, or be very conservative with clippers. Check every two weeks from 8 weeks of age.
Seniors. Older dogs often exercise less, which removes the natural filing effect of pavement walks. Nails can also become thicker and more brittle with age, which makes clippers more likely to crush. A grinder at low speed is often kinder for senior dogs. If your dog was a once-every-six-weeks dog in their active years, shift to monthly checks in their senior years, the schedule very commonly needs updating.
Quick reference: how often should you cut your dog’s nails?
| Dog type | Typical trim interval | Watch especially for |
|---|---|---|
| Active dog, regular pavement walks | Every 5 to 6 weeks | Dewclaws still need checking |
| Most dogs (mixed surfaces, moderate activity) | Every 3 to 4 weeks | The click test each month |
| Indoor dog, grass-only, or low-activity | Every 2 to 3 weeks | Nails tend to grow fast without wear |
| Puppy (any) | Every 2 weeks | Sharp tips, fast growth, habit-building window |
| Senior dog (reduced activity) | Every 3 to 4 weeks minimum | Nails can thicken and become brittle |
| Dewclaws (all dogs) | Weekly check, trim as needed | Curling toward the pad, a vet issue |
The real answer is always when the nails are approaching the floor, not when a fixed calendar says so. Build a weekly paw-check habit and you’ll catch the right moment for your specific dog every time.
For a full walkthrough of every at-home grooming task, see our dog grooming tools hub and the how to groom a dog at home step-by-step guide.
Keep reading: grooming guides
Cutting dog nails: common questions answered
How often should you cut a dog’s nails?
Most dogs need a nail trim every 3 to 4 weeks. The real test is the click test: if you hear nails clicking on a hard floor, or the nails visibly touch the ground when the dog stands squarely, they’re overdue. Active dogs on pavement may go 5 to 6 weeks; indoor or grass-only dogs often need trimming every 2 to 3 weeks. Dewclaws should be checked weekly since they never wear down naturally.
What happens if you don’t cut your dog’s nails?
Overgrown nails cause a real chain of problems: the toes get pushed back and sideways on every step, which is painful; the feet can splay permanently; the altered gait puts extra strain on the hips, stifles, and back; long nails snag and tear more easily; and the quick (blood vessel inside the nail) grows forward with the nail, making future trimming more difficult and riskier. Regular short trims actually train the quick to recede over time.
How do you know when a dog’s nails are too long?
Two quick tests: the click test (do the nails click on hard floors?) and the standing ground test (can you see nails touching the floor when the dog stands squarely?). Either one means the nails are too long. Ideally you trim before reaching that point, the target is nails that clear the ground by 2 to 3 mm when the dog stands flat-footed.
Is it better to use a dog nail grinder or clippers?
For most large-breed owners, a rotary grinder (like the Dremel 7300-PT) is safer and produces a better finish than clippers. A grinder removes material gradually, giving you much more control near the quick, and leaves a smooth, rounded edge. Clippers are faster but cut all at once, one slip and you’ve hit the quick. For thick nails, clippers can also crush before they cut. Grinders are the better choice for nervous dogs and dogs with black nails where you can’t see the quick.
How do I trim my dog’s nails if they hate it?
The key is gradual desensitisation, not powering through. Start with paw handling alone (no tools) and reward heavily with high-value treats. Once the dog is calm with paw contact, introduce the tool off, then running near the dog, then touching one nail at a time. Doing one nail per session is a legitimate approach, spread over a week, you’ve done all 20 nails with zero stress. For dogs with severe nail anxiety, a professional groomer or vet trim can reset the association before reintroducing home trims.
How do you find the quick on black dog nails?
Work in small increments and inspect the cut cross-section after each pass. On light nails you can see the quick as a pink shadow, on dark nails, look for the centre of the nail to change from a dry, chalky appearance to a small dark dot (sometimes called the pulp). That dot means you’re close to the quick; stop there. A grinder is easier to control on black nails than clippers because you remove material slowly and can stop at the first sign you’re near the quick.