DIY Solar Heated Dog House Blueprint & Wiring
The measurements, not the motivation. Exact interior dimensions by dog size, a full cut list, and the 12V wiring layout drawn out part by part — so you can build it right the first time.
Most solar dog house guides tell you why to build one. This is the blueprint — the actual numbers. Below you’ll find a sizing table that gives the interior length, width and height for small, medium, large and giant dogs, a board-by-board cut list you can take to the lumber yard, and a wiring diagram laid out as a simple chain: panel to charge controller to battery to heated pad. Measure once against this, cut once, and wire it in the right order.
Interior dimensions by dog size
Get the box size right and everything else gets easier — a snug house warms faster on less solar power, while an oversized one never holds heat. The rule of thumb: the dog should be able to stand without ducking, turn around, and lie down stretched out, with maybe an inch or two to spare — no more. These are interior dimensions (the usable space after insulation), with the doorway sized to the dog’s shoulder height, not the full opening.
| Dog size | Example breeds | Interior L × W | Interior height | Doorway (W × H) |
|---|---|---|---|---|
| Small (up to 25 lb) | Terrier, Beagle, Frenchie | 24" × 20" | 22" | 8" × 14" |
| Medium (25–55 lb) | Border Collie, Bulldog | 32" × 26" | 27" | 10" × 18" |
| Large (55–90 lb) | Lab, GSD, Boxer | 40" × 30" | 32" | 12" × 22" |
| Giant (90 lb+) | Great Dane, Mastiff | 48" × 36" | 38" | 14" × 26" |
Add roughly 1.5" per insulated wall to these interior figures to get your exterior frame size if you’re insulating with rigid foam board. The doorway should sit off-centre on one wall so the dog can curl into a draught-free corner.
💡 A quick sizing tip
The cut list
This is the lumber and panel breakdown for a medium (Border Collie-size) house from the table above; scale each dimension to your size class. Built from 3/4″ exterior plywood with a rigid-foam insulation layer, it’s a butt-jointed box you can assemble with a drill and exterior screws — no fancy joinery.
- Floor × 1 — 32" × 26" plywood (the insulated platform)
- Side walls × 2 — 32" × 27" plywood
- Front & back walls × 2 — 27.5" × 27" plywood (cut the off-centre doorway in the front)
- Roof panels × 2 — 34" × 18" plywood, sloped for run-off, with a 2" front overhang
- Rigid foam board — 1" or 1.5" sheets to line floor, all four walls, and the roof underside
- Inner liner × 1 set — thin plywood or HDPE over the foam so the dog can’t chew it
- Base rails × 2 — 32" pressure-treated 2×2s (raise the house off the ground)
- Roof hinge / batten — for a lift-off or hinged roof to reach the wiring
- Fasteners — 1.25" exterior screws, construction adhesive for the foam, exterior sealant
Cut the doorway first while the front panel is flat and easy to clamp. Dry-fit the whole box before any glue or foam goes in.
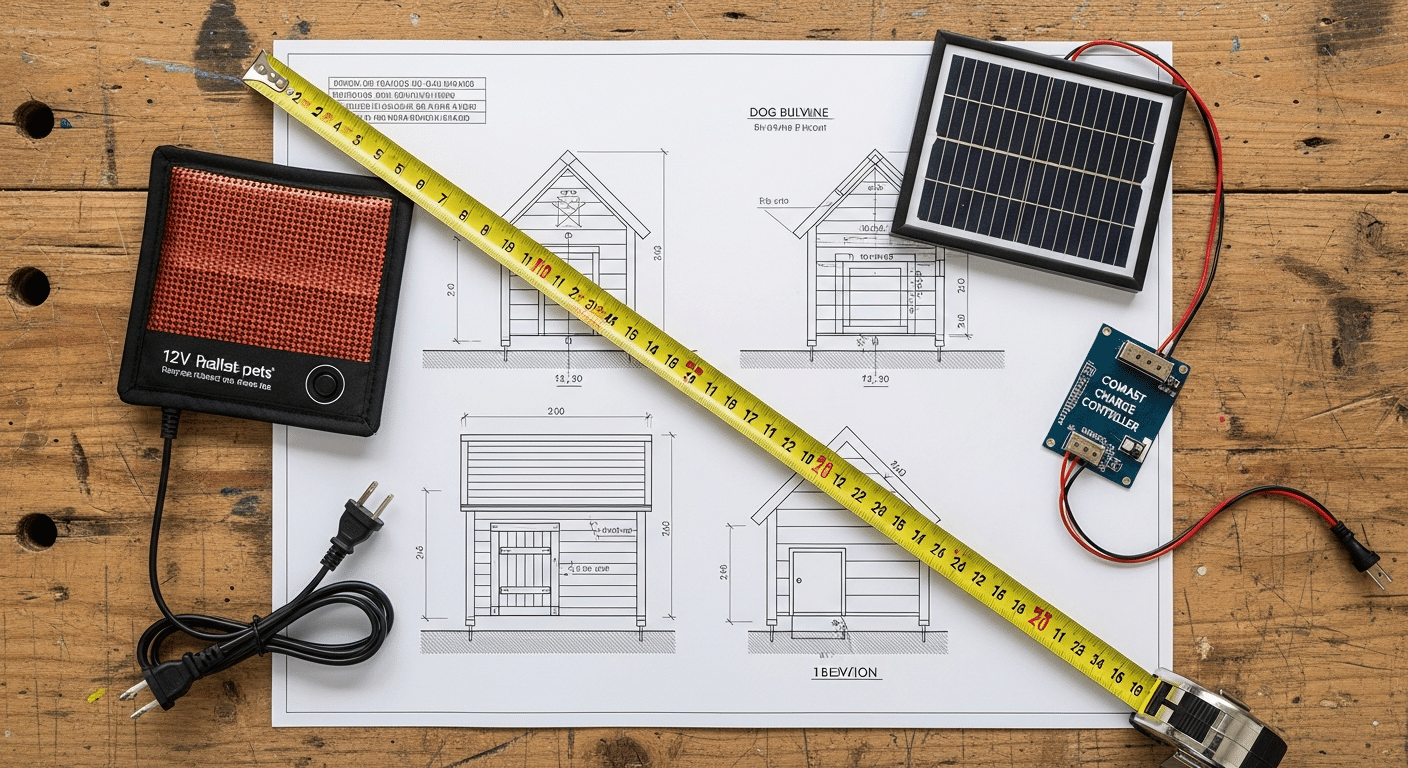
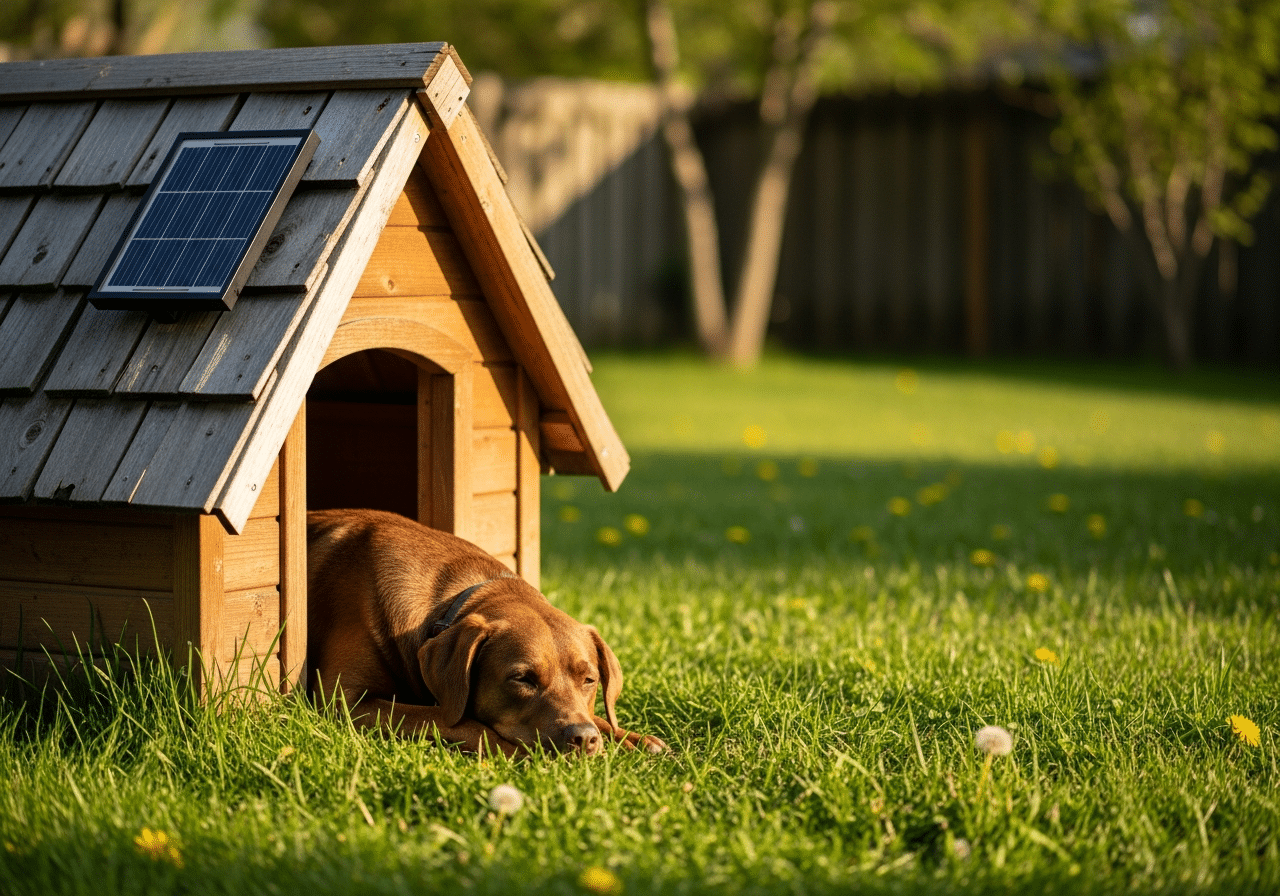
The 12V wiring diagram, part by part
The electrical side is a single low-voltage 12V chain — there is no mains wiring, so no shock risk and no electrician. Power flows in one direction: solar panel → charge controller → battery → heated pad. The charge controller is the brain in the middle: it takes the variable output of the panel and feeds the battery safely, then the battery runs the pad day and night. Wire it in this exact order:
- 1. Mount the charge controller inside a sealed exterior junction box on a side wall. Everything connects to it.
- 2. Connect the battery to the controller FIRST. Controllers need to “see” the battery before the panel — wire battery + and − to the controller’s battery terminals. Add the inline fuse on the positive lead, close to the battery.
- 3. Connect the solar panel to the controller second. Run the panel leads to the controller’s solar terminals (the keyed MC4 connectors only fit one way). Never reverse this order.
- 4. Connect the heated pad to the controller’s load output (or directly to the battery via the fuse if your pad has its own thermostat). Route the pad lead through the floor into the insulated chamber.
- 5. Test before the dog moves in. Let it run a sunny day; confirm the controller shows charging and the pad is warm, not hot.
| Link in the chain | Job | Typical spec (medium house) |
|---|---|---|
| Solar panel | Generates power from sun | 50–100W 12V panel |
| Charge controller | Regulates charge, protects battery | 10–20A PWM/MPPT, 12V |
| Battery | Stores power for night/cloud | 12V 20–35Ah sealed/LiFePO4 |
| Heated pad | Warms the floor | Low-watt 12V pad w/ thermostat |
For the science behind sizing a small off-grid panel to a load like this, the U.S. Department of Energy’s solar energy basics is a solid, non-commercial primer.
Weatherproofing the wiring
A blueprint that ignores the weather fails in the first storm. The wiring is the most vulnerable part of the whole build, so protect it deliberately:
- House the controller and battery in a sealed IP-rated box mounted on the outside wall, not loose inside the dog’s chamber. This keeps heat-producing electronics away from the dog and damp away from the electronics.
- Seal every cable entry with a rubber grommet and exterior silicone where wires pass through the wall or floor — these holes are where water gets in.
- Run a drip loop on each external cable so rainwater drips off the low point instead of tracking into a connector.
- Use the panel kit’s MC4 connectors outdoors — they’re rated for weather; never leave bare splices exposed.
- Keep the inline fuse accessible but protected, and zip-tie cabling flat against the structure so wind and chewing can’t tug it loose.
- Protect the pad lead inside with a chew-resistant sleeve where it enters the dog’s space.
Done right, the only thing your dog ever touches is a warm, covered pad — every connector, fuse and wire lives sealed and out of reach.
