 Dog Gear, Sized Right
How to Weatherproof a Dog Kennel (Heat, Cold & Rain)
A step-by-step, season-by-season guide to keeping your dog’s outdoor kennel comfortable, from summer heat and winter cold to heavy rain and driving wind.
Most outdoor kennels ship weatherproof on the label and barely weatherproof in practice. The thin plastic roof warps after one summer. The metal frame turns into a radiator by July. The door gap lets a January draft straight in. This guide walks you through exactly what to fix, season by season, with real materials and real measurements, not vague tips.
Why Weatherproofing Actually Matters (It’s Not Just Comfort)
Dogs regulate body temperature less efficiently than humans. A medium-sized dog in a 90 °F (32 °C) kennel with no airflow can develop heat stress within 15 minutes. At the other extreme, a wet dog in a poorly insulated kennel at 30 °F (-1 °C) loses body heat three times faster than a dry dog — moisture destroys insulation value. And a damp kennel interior, even without rain, is enough to cause skin fold dermatitis, hot spots, and respiratory issues in dogs that sleep there nightly.
Weatherproofing is also about structural longevity. An unsealed wooden kennel in a wet climate can develop rot in the floor and lower wall joints within 18 months. Metal kennels develop surface rust that becomes structurally compromising rust in two to three seasons. The good news: most fixes cost under $50 in materials and a weekend afternoon per season.
Before you start buying materials, spend five minutes assessing what you actually have:
- Floor type — solid wood, slatted plastic, dirt, or raised platform? This changes your insulation approach completely.
- Wall and roof material — softwood, hardwood, galvanized metal, polycarbonate, or moulded plastic?
- Door style — open arch, hinged door, or hanging flap? Each has a different draft vulnerability.
- Orientation — which direction does the door face? A north-facing door catches less winter sun but may block prevailing wind; a south-facing door lets in summer glare.
The fixes below are organised by season so you can tackle the most urgent problem first. Most owners need two or three of the four sections, not all of them. If you’re also evaluating whether to ditch the existing structure entirely and start fresh, the dog kennels hub and dog houses hub cover what to look for in a purpose-built, weather-rated enclosure.
Summer Weatherproofing: Shade, Ventilation & Heat Reflection
Summer is where most kennels fail most visibly — and where getting it wrong carries the highest health risk. Dogs can’t sweat through their skin the way humans do. They cool via panting and, to a lesser extent, through the pads of their feet. A kennel that traps heat turns a cool-air oasis into an oven.
Position and Shade
Before any materials: does the kennel get direct afternoon sun? Afternoon sun (roughly 1 pm to 6 pm) is the hottest, and it hits from the west and southwest. If your kennel faces west, it absorbs three to four hours of the day’s peak heat through the door opening. The simplest fix is repositioning — east-facing doors get morning light only, with the back wall taking the hot afternoon sun instead of the opening.
If you can’t move the kennel, a shade sail or 70% density shade cloth rigged two feet above the roof makes a significant difference. The gap between the cloth and the roof allows hot air to escape rather than collect. Use stainless steel cable and tension it tightly — a slack shade sail acts like a sail in wind and can bring a kennel down.
Natural shade from a deciduous tree is ideal: full shade in summer, sun through bare branches in winter. But position the kennel far enough from the tree that falling branches and leaf litter aren’t a problem. Avoid parking kennels under conifers — resin sap drips are persistent and the permanent canopy blocks winter light.
Roof Colour and Reflective Coatings
Black or dark-brown roofing on a plastic or asphalt-shingle kennel can reach 160 °F (71 °C) on a 90 °F day. A light-coloured or white roof reaches roughly 90 °F under the same conditions. If you can’t replace the roof material, a coat of elastomeric roof coating (sold at hardware stores as “cool roof” or “reflective roof” paint) reduces roof surface temperature by 30 to 50 degrees Fahrenheit. Apply two thin coats, let dry 24 hours between coats, and reapply every two to three seasons. Cost: around $30 for a quart, which covers a 4 × 6 foot roof twice.
Ventilation and Airflow
A kennel with no ventilation ports acts as a closed chamber. Hot air rises and has nowhere to go. The fix is cross-ventilation: an opening low on one wall (intake) and one high on the opposite wall (exhaust). On a wooden kennel, drill a 3-inch circular vent hole low on the shaded wall and cover it with a galvanised mesh stapled from the inside (keeps insects out). Cut a matching vent hole high on the sun-facing wall or in the roof peak. This creates a chimney effect: cooler air enters low, hot air exits high.
On a metal or wire kennel, airflow is less of an issue structurally — the concern is radiant heat from the metal panels themselves. A canvas tarp or bamboo shade panel clipped to the sun-facing wall provides both shade and airflow since the material doesn’t seal the enclosure.
Raised Flooring
A floor flush with the ground stays warm because the ground stores heat and releases it at night. Elevating the kennel base on 4-inch posts (or swapping the floor to a raised plastic slat platform) creates an air gap underneath. That air gap dramatically reduces floor temperature in summer and, crucially, also keeps the floor dry after rain.
Raised plastic slat floors (the same style used in horse stalls and commercial kennels) drain immediately, dry fast, and don’t absorb heat the way solid plastic does. They cost roughly $30 to $60 for a 4 × 4 foot section and can be cut to size. Avoid rubber mats on outdoor kennel floors in summer — rubber is an excellent heat retainer.
Cooling Accessories
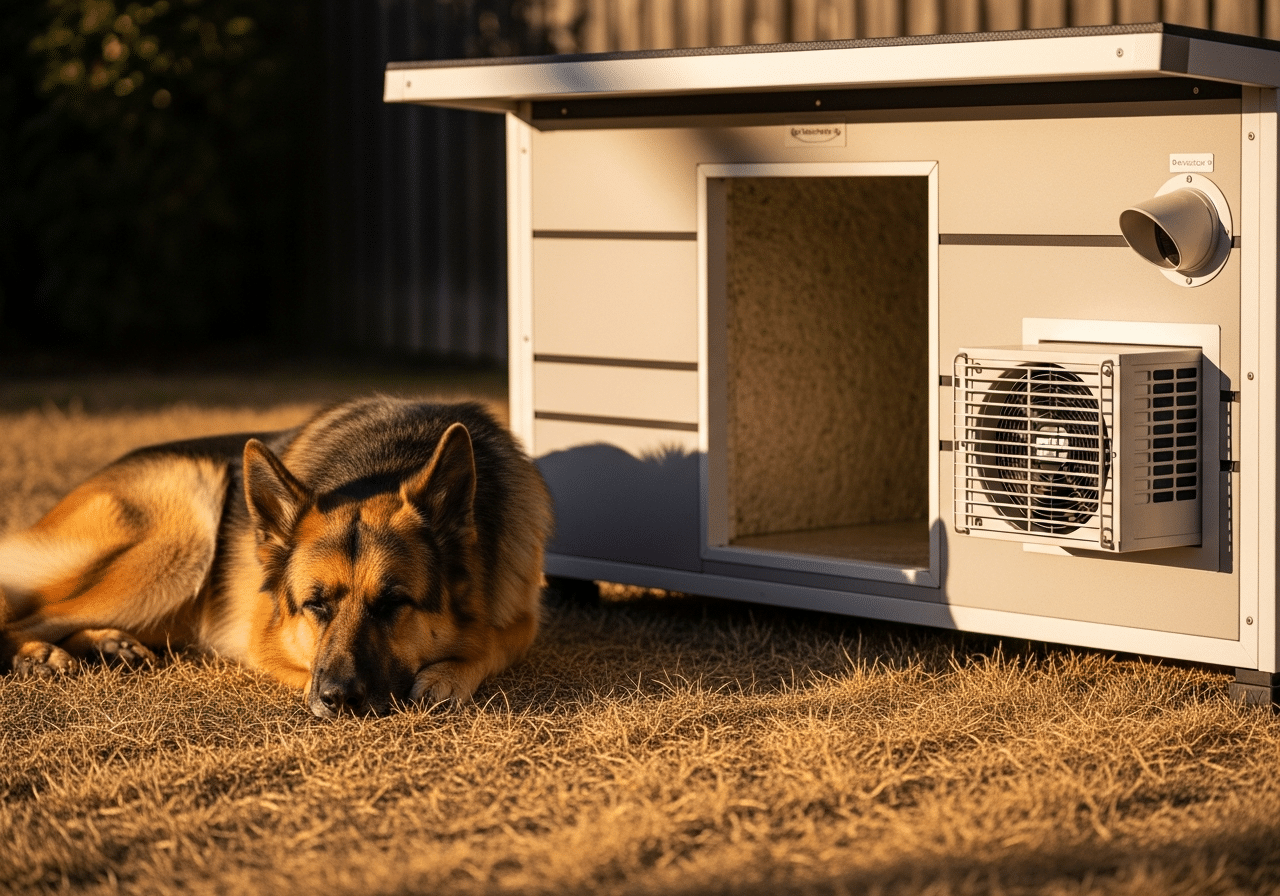
Once the structural work is done, cooling dog beds provide the last layer of temperature management. Pressure-activated gel beds work without electricity and hold cooling capacity for three to four hours. Self-cooling mats that use water evaporation are better in dry climates; gel beds work better in humid conditions where evaporation is slow. A cooling bed is not a substitute for shade and ventilation — it’s the last 10% after the structural fixes are done. For kennels in extreme heat climates, see the air-conditioned dog house hub for purpose-built AC solutions.
Winter Weatherproofing: Insulation, Draft-Proofing & Bedding
The three enemies in winter are cold air infiltration (drafts), moisture from condensation, and heat loss through uninsulated walls and floor. The irony is that over-insulating a small kennel without any ventilation creates a third problem: moisture builds up from the dog’s breathing and body, creating a damp interior that feels colder than an uninsulated kennel with dry air. You’re balancing insulation against ventilation.
Insulating the Walls and Roof
Rigid foam board insulation (polyisocyanurate or XPS/extruded polystyrene) is the best choice for kennel walls. It’s lightweight, has the highest R-value per inch of any common insulation material, and doesn’t absorb moisture the way fibreglass batts do. For a typical wooden kennel with 3/4-inch plywood walls, adding 1-inch rigid foam board to the interior walls and ceiling brings the insulation from roughly R-1 to R-6.5 — enough to hold the kennel’s interior temperature 15 to 20 degrees above the outdoor ambient temperature from the dog’s own body heat alone.
The process for a wooden kennel:
- Cut rigid foam board panels to fit each interior wall section and the ceiling. A box cutter and straight edge work fine.
- Glue panels in place with foam-compatible construction adhesive (check the label — some solvents dissolve polystyrene).
- Cover the foam with 1/4-inch plywood or hardboard sheeting, screwed to the studs through the foam. This is the critical step: dogs chew exposed foam and it’s harmful if ingested. Never leave foam board exposed on interior surfaces.
- Seal the joints between panels with canned foam sealant, then trim flush once cured.
For plastic kennels (like the Petmate or similar moulded designs), rigid foam insulation kits are sold specifically for these models. The foam panels clip or velcro to the interior walls and are sized to leave the door opening clear. They’re not as effective as a site-built plywood-and-foam job, but for mild winters they’re adequate and take 15 minutes to install.
Insulating the Floor
Heat loss through the floor is often overlooked and is frequently the biggest single source of heat loss in an elevated kennel in winter. A 2-inch XPS foam board between the floor joists, sealed at the edges with foam sealant, provides R-10 floor insulation. If the kennel floor is a solid raised-plastic platform, lay a 1-inch closed-cell foam mat on top (cut to size), then cover with an outdoor-rated polypropylene rug or a marine-grade carpet square to prevent slipping. Avoid open-cell foam or regular carpet — these absorb moisture.
Draft-Proofing the Door
A hanging vinyl door flap is the most effective draft-proofing addition you can make to an arch-entry kennel. Commercial kennel flaps use 1/8-inch to 3/16-inch clear PVC sheeting cut into overlapping vertical strips (75mm wide strips for large dog entries are standard). The strips overlap by at least 50% of their width, so the dog pushes through without creating a large gap. Full-sheet flaps work but require the dog to push the full weight of the flap on every entry and exit, which some dogs resist doing in cold weather.
For hinged-door kennels, weatherstripping around the door frame is a 20-minute job: self-adhesive EPDM foam tape (6mm diameter, sold in 10-metre rolls) applied to the inner edge of the door frame compresses when the door closes and eliminates the draft line. Check and replace annually — compression fatigue reduces its effectiveness after one season in a frequently-used door.
Sealing Gaps and Penetrations
Inspect all corners, the roof-to-wall joint, and any cable or plumbing penetrations with a torch on a sunny day — light showing through = cold air draft. Exterior-grade siliconised acrylic caulk handles most gaps on wood. For metal kennels, use a silicone-based (not acrylic) caulk rated for metal expansion and contraction. Both are paintable if aesthetics matter.
Bedding
Straw is consistently the best outdoor bedding material for winter. It has natural insulation properties and doesn’t retain moisture the way shredded newspaper or regular blankets do. Change straw at least weekly — compressed damp straw loses its insulating loft and becomes cold faster than bare wood. Use a 3-4 inch deep layer. Avoid hay (it mats, compresses faster than straw, and is more prone to mould). Cedar shavings smell good but off-gas aromatic oils that cause respiratory irritation in some dogs, especially in a closed space overnight.
If the dog is older, arthritic, or has joint issues, an orthopedic dog bed inside the kennel provides pressure point relief alongside warmth. Use an outdoor-rated cover (water-resistant or removable/washable) to handle the inevitable moisture from condensation.
Rain and Wind: Waterproofing, Drainage & Elevation
Rain and wind are the fastest ways to undo summer and winter weatherproofing work. A well-insulated kennel becomes useless if the roof leaks. Elevated flooring loses its benefit if the run drains toward the kennel and sits in a pool. These fixes focus on keeping water out at every point of entry.
Roof Slope and Overhang
A flat roof on an outdoor kennel is a design flaw. Water pools, seeps into seams, and accelerates decay at the roof-to-wall joint. The minimum functional slope for a kennel roof is 1:12 — 1 inch of rise for every 12 inches of run. A 3:12 to 4:12 pitch sheds water actively and allows significantly longer intervals between roof maintenance.
Overhang matters as much as slope. A roof that ends flush with the walls creates a waterfall effect at the wall face every time it rains. A 3-inch overhang on all four sides keeps the majority of rain away from the wall joints. If you’re retrofitting a flat-roofed kennel, the cheapest approach is to build a simple A-frame roof structure in treated pine or cedar above the existing roof, angled to shed water away from the door.
Waterproofing the Roof Surface
The material options, from least to most durable:
- Corrugated polycarbonate panels: Lightweight, translucent, easy to cut and screw down. Good for smaller kennels. Not suitable as a permanent roof for large structures; expansion and contraction can crack panels at screw holes within 3-4 seasons if not installed with the correct oversize washers.
- Asphalt shingles: The most common retrofit option for wooden kennels. Peel-and-stick roll roofing (a single-ply asphalt membrane) is faster to install than tabbed shingles on small surfaces and provides a fully waterproof seal if lapped 4 inches at seams.
- Liquid rubber membrane: Painted-on rubberised coating (available from roofing suppliers and large hardware chains). Apply two coats, let cure 24 hours between coats. Excellent at sealing irregularly-shaped surfaces and around penetrations. Reapply every 3-5 seasons. This is the easiest option for plastic or metal kennels where nailing shingles isn’t feasible.
- Metal roofing: Galvanised steel or colorbond corrugated panels. Extremely durable (30+ year lifespan with proper installation). Noisy in rain (relevant if your dog is noise-sensitive). Must be installed with rubber-gasketed screws at every ridge or water tracks back along the screw shank into the structure.
Sealing Gaps and Joints
On wooden kennels, the roof-to-wall joint is almost always the first place water enters. A run of self-adhesive flashing tape (the butyl-backed type used in house construction) over the joint, lapped 4 inches up the wall and 4 inches onto the roof, stops capillary moisture infiltration that caulk alone misses. Over the flashing tape, apply a bead of paintable silicone caulk to seal the tape edges from UV degradation — UV breaks down butyl adhesive in 2-3 seasons if left exposed.
Inspect the floor-to-wall joint on the inside annually. This is where splashed water and condensation collect, and the first place floor rot starts in wooden kennels. A bead of exterior silicone caulk along this joint, re-applied when it shows cracking, dramatically extends floor life.
Drainage and Elevation
The ground around and under a kennel needs to drain away from it. A 2% slope (roughly 1/4 inch per foot) in the surrounding ground, directed away from the kennel on all sides, prevents pooling. If the site is flat, build it up with a layer of compacted gravel before placing the kennel: a 6-inch gravel base provides excellent drainage and discourages digging underneath.
Kennel elevation rules of thumb:
- Minimum 4 inches off the ground to clear splashback from rain and allow under-floor airflow
- 6 to 8 inches if your area gets sustained ground-level water after rain
- 12 inches if you’re in a flood-risk zone or have a high water table
Pressure-treated pine at 4 × 4 inch dimensions is the standard leg material for DIY raised kennel platforms. Use concrete footer blocks at each corner leg to prevent the wood from sitting directly on soil and wicking moisture up into the frame.
Wind
Wind drives rain horizontally into even well-roofed kennels and creates a wind-chill effect inside. The door should face away from your area’s prevailing wind. In most of the UK and the US Pacific Northwest, that means facing east or south. In the US Great Plains, face the door south or east to avoid prevailing northerly and westerly winds.
If you can’t orient the kennel away from the wind, a solid windbreak on the prevailing-wind side — a close-board fence panel, a stacked timber wall, or dense evergreen hedging — breaks the wind before it reaches the kennel. Position the windbreak 2 to 3 kennel-lengths away (not flush against the kennel) so it deflects rather than channels wind.
Choosing the Right Weatherproofing Materials by Kennel Type
The fixes above apply differently depending on what your kennel is made of. Here’s a quick material-specific guide:
| Kennel Material | Strengths | Vulnerabilities | Best Weatherproofing Approach |
|---|---|---|---|
| Pressure-treated wood | High insulation, DIY-friendly, easy to modify | Rot at joints if unsealed; needs annual inspection | Exterior primer + paint every 3 years; caulk all joints; rigid foam interior insulation |
| Cedar or redwood | Naturally rot-resistant, good insulation, smells pleasant | Expensive; aromatic oils can irritate sensitive dogs if heavily enclosed | Penetrating oil finish (tung oil or linseed) annually; still caulk joints; no interior foam needed in mild climates |
| Galvanised steel wire | Excellent ventilation, very durable structurally | Zero insulation; radiant heat in summer; no rain protection | Canvas or tarpaulin cover for roof and sun-facing wall; foam-board doghouse inside the run for sleeping; shade cloth for summer |
| Moulded plastic (blow-moulded) | Low maintenance, lightweight, easy to clean | Poor insulation; UV-degrades in direct sun over 5-7 years; limited modification options | Reflective roof paint; clip-in foam insulation kit for winter; shade sail for summer; replace before UV degradation causes cracks |
| Polycarbonate / hardboard composite | Durable, better insulation than single-skin plastic | Panel joints can pull apart; screws pull through if overtightened | Butyl flashing tape at all panel joints; avoid metal screws directly into polycarbonate (use rubber-gasketed); |
One point that applies across all materials: do not seal a kennel airtight. Every structure needs some ventilation, even in winter, to prevent moisture build-up from the dog’s breathing. The goal is eliminating drafts and cold infiltration, not eliminating air exchange entirely.
Season-by-Season Weatherproofing Checklist
Use this as your annual maintenance schedule. The tasks are quick; most take under 30 minutes. The bigger jobs (insulation, roof resurfacing) you’ll likely do once and maintain thereafter.
| Season | Task | Time | Notes |
|---|---|---|---|
| Spring | Inspect roof for winter damage; re-caulk cracked joints; check floor for rot | 45 min | Do this before first hot spell |
| Late Spring | Rig shade sail or shade cloth; check door orientation; remove winter bedding | 30-60 min | Replace straw with raised slat floor or outdoor mat |
| Summer | Apply reflective roof coating if surface temp is high; add or check ventilation ports | 2-3 hrs (coating) | Also ensure fresh water is accessible close to kennel |
| Early Autumn | Remove shade cloth; inspect door flap; apply fresh caulk to roof-to-wall joint | 60 min | Before first rain season hits |
| Late Autumn | Install or check interior foam insulation panels; replace weatherstripping on door frame | 2-4 hrs | Do before temperatures drop below 45 °F / 7 °C |
| Winter | Add straw bedding; check door flap hangs freely; confirm no drafts at floor level | 30 min | Replace straw every 7-10 days |
When to Stop Patching and Upgrade the Kennel Instead
There’s a point where weatherproofing an old kennel costs more in materials and time than the kennel is worth. Here are the signs that you’re past that point:
- Floor rot extends more than 30% of the floor area. Rot spreads faster than it’s visually apparent. If a probe (screwdriver tip) goes through the floor surface anywhere, you’re likely dealing with rot in the subframe as well.
- The roof-to-wall joint has separated structurally (not just caulk cracking, but the actual wood pulling apart). This indicates the frame has moved, and re-caulking won’t hold long-term.
- Mould visible on interior surfaces despite cleaning. Deep structural mould in wood is almost impossible to fully remediate — it returns within 2-3 seasons even after bleaching.
- Metal framework shows through-rust (rust that penetrates the full thickness of the metal, not just surface oxidation). Patch welding is feasible; perforated metal is not.
- The dog consistently refuses to use the kennel despite all weatherproofing work. Dogs are direct: if the kennel is uncomfortable despite your modifications, trust that assessment.
When you reach this point, it’s worth reviewing purpose-built options. The dog kennels hub covers wire, wooden, and modular kennel systems with tested weatherproofing credentials. The dog houses hub covers insulated and weather-rated dog houses that are built for outdoor use from the ground up — with real insulation values and roof drainage built in rather than retrofitted. For hot climates specifically, the air-conditioned dog house hub covers structures with active cooling built into the design — a real option when ambient temperatures regularly exceed 95 °F.
If you do upgrade, apply everything from this guide to the new structure from day one: position it correctly, add a shade sail before the first summer, caulk all joints at installation, and add door weatherstripping before the first winter. Maintenance is faster and cheaper when you start with a weatherproofed structure than when you try to reverse-engineer one.
More dog housing guides
Weatherproofing FAQs
What is the best material to weatherproof a dog kennel roof?
For most wooden kennels, peel-and-stick roll roofing (asphalt membrane) is the most reliable option — it’s fully waterproof, easy to cut to size, and lasts 10-15 years with basic maintenance. For plastic or metal kennels where you can’t nail shingles, liquid rubber membrane coating applied in two coats provides an excellent waterproof seal and bonds to almost any surface. Whichever material you use, slope is the key variable: a flat roof will fail regardless of surface treatment. Aim for at least a 1:12 pitch.
How do I keep my dog’s outdoor kennel cool in summer?
Tackle the problem in order: first, position the kennel so the door faces away from afternoon sun (west-facing = worst case). Second, rig a shade sail or 70% shade cloth at least 18 inches above the roof to allow hot air to escape from the gap. Third, apply reflective roof coating to reduce surface temperature by up to 50 °F. Fourth, add ventilation ports low on the shaded wall and high on the sun-facing wall to create a chimney effect. Finally, add a raised slat floor and a pressure-activated cooling bed inside. Each step compounds the effect.
How do I insulate an outdoor dog kennel for winter?
Use 1-inch rigid foam board (XPS or polyisocyanurate) cut to fit the interior walls and ceiling. Glue it in place with foam-compatible adhesive, then cover every panel with 1/4-inch plywood or hardboard screwed to the studs — exposed foam is harmful if chewed. Add a 2-inch foam board between floor joists or a closed-cell foam mat on top of a raised platform floor. Seal all gaps with canned expanding foam, then add a hanging vinyl strip door flap and EPDM weatherstripping around the door frame. This combination typically keeps interior temperature 15-20 °F above ambient from the dog’s body heat alone.
How high should I raise an outdoor dog kennel off the ground?
The functional minimum is 4 inches — enough to clear ground-level splashback and allow air circulation under the floor. In areas with sustained rainfall or periodic pooling, 6 to 8 inches is a better baseline. For flood-risk sites or high water table areas, 12 inches or more. Use 4 × 4 inch pressure-treated pine legs with concrete footer blocks at each corner to prevent the wood from wicking moisture directly from soil. A 6-inch compacted gravel base under the kennel also improves drainage significantly.
Is expanding foam safe to use for kennel insulation?
Canned expanding foam (polyurethane) is fine for sealing gaps and penetrations in kennel structures — it’s the right tool for filling the joint between insulation panels and for sealing cable/plumbing penetrations. It should not be used as a surface-exposed interior material. Once cured, expanding foam is brittle, crumbles, and will be chewed by curious dogs. Any expanding foam used inside a kennel must be trimmed flush and covered with a solid panel (plywood or hardboard) before the dog occupies the space.
Should I use straw or blankets for winter bedding in an outdoor kennel?
Straw is consistently better than blankets for outdoor kennels. Straw has natural insulating loft that blankets lose when compressed or damp, and it doesn’t absorb moisture the way woven fabric does. A 3-4 inch deep layer of straw, changed weekly, provides good insulation and dries faster than any blanket. Avoid hay (it mats and molds faster than straw) and cedar shavings (aromatic oils can irritate respiratory tracts in an enclosed space). If your dog already uses a bed, opt for an orthopedic or water-resistant-cover design rated for outdoor use alongside the straw, rather than instead of it.
How do I know if my dog’s outdoor kennel needs replacing rather than repairing?
Replace rather than repair when: (1) floor rot covers more than 30% of the floor area or affects the subframe; (2) the roof-to-wall joint has structurally separated (not just cracked caulk); (3) mould returns on interior surfaces within two seasons of treatment; (4) metal framing shows through-rust (full thickness penetration, not surface oxidation); or (5) your dog refuses to use the kennel despite all weatherproofing work. If you’re at this point, the dog kennels hub and dog houses hub are good starting points for purpose-built replacements.